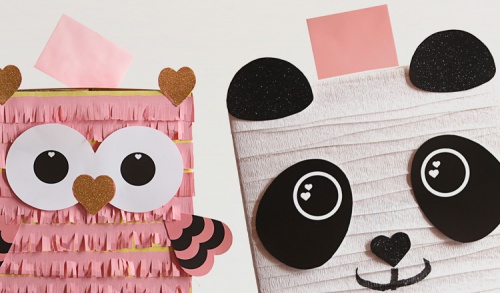
Make a Valentine's Day Bag for Your Child
Your child will delight in making this old- fashioned Valentine bag for holding lots of fun filled Valentines that they receive at school. It's simple and useful, making it a great school project for kids.
Steps
- Set up a work area with all items needed for this project. See "Things You'll Need" below for the supplies.
- Lay the Valentine's bag on a flat surface. Using either the colored pencils or crayons, write the words "Happy Valentine's Day". Do this on both sides of the bag.
- Use the construction paper to make some decorations for the bag. Draw and cut out a few (small) pink and red hearts.
- Glue the hearts on the bag. Add decorative Valentine stickers if desired.
- Add a handle too. You don't need to include one, but if you would like to have a handle, there are two different ways to make it:
- Hole punch handle: Make a handle by punching a hole to each side of the bag, about an inch (2.5cm) down from the top. A hole puncher can be used, or use a sharp object able to make small holes. Then, run the ribbon through the holes, and tie off on each side. More ribbon can be tied on to the side to give the bag more appeal, such as using ribbon of a different color.
- Strip handle: Alternatively, cut a strip of construction paper (in pink or red) to make a handle. Glue each of the ends to each of the sides of the bag, namely the inside of the bag. Leave to dry before using.
- Finished.
Tips
- If you so desire, you could write the child's name on the bag, giving it that personal touch.
- The ribbons could also be tied into bows if preferred.
- The bag should be lightweight enough that it can be carried by the handle, but if it is heavy or weighted down, it can be grabbed from underneath.
- If you choose not to go with a handle, you may still want to punch some holes (in the bag) and just add ribbon to each of the sides; you could use several different colors, such as pink, red, and white. Use a case knife or sharp side of a scissor blade to run across the ribbon to get it to curl up.
Warnings
- Don't go overboard on the glue; apply a thin even coat to the area that glue is needed.
- Supervise any use of sharp instruments to make holes in the bag––an adult should do it if a hole puncher is not being used.
Things You'll Need
- Small white lunch bag
- Arts and craft colored pencils or crayons
- Colored construction paper (red and pink)
- Thin (red or pink) or both ribbon (optional)
- Scissors
- (Elmer's) white glue or craft glue
- Decorative Valentine's stickers are optional
Related Articles
What links here
- Plan the Perfect Valentine's Day for Your Husband
- Give Unique Valentine's Day Gifts That Say What You Mean
- Make Cards for Valentine's Day
- Make Valentine's Day Extra Special
- Make a Gift Bag
- Make a Quick Quilt
- Use Purse Twist Turn Locks
- Feel the Spirit of Valentine's Day
- Make Your Kids Smile on Valentine's Day
- Make a Cool and Unique Valentine's Day Box
